Saturday, 8 October 2011

photoshop workshop 1 - Moving images

To move your image onto your document you need to select the move tool.

  
Once selected click on the image you wish to move.


Whilst holding the mouse button down, move your cursor to where you wish to place the image.


One you let go of the mouse button the image will stay there.


photoshop workshop 1 - Rotating document.

To rotate your document to landscape you must select Image from the top tool bar.


Then select Image Rotation and 90 CW (clock wise).


Once this has been selected your document will change to landscape.

photoshop workshop 1 - Open a new file

To open a new file select File from the top menu bar in the left hand corner.


Then select New. Also you can press CTRL & N together to skip this step.

This will then open a new window.


In here you can change the file name and the paper size. To change the paper size first you must select the drop down box for Preset: and choose international paper.


The Size: option is now available and you can use the drop down box to select the correct size. Once selected press OK and this will open the document.

Thursday, 6 October 2011

Photoshop workshop 1 - Liquify image

To use the liquify function in photoshop, firstly open the image you wish to use.


On the menu bar select Filter and then liquify.


This will then open the image in a new screen as below.


Select the top icon in the tool bar on the left hand side. This is called the forward warp tool.


Then select your desired brush size to use from the menu on the right hand side. You do this by selecting the blue drop down box on brush size and moving the slider. Bigger brush sizes are best for this.


Then select the areas you wish to manipulate. If you hold the mouse button down and move the curser you can stretch,enlarge and shrink the desired areas. This is used lots in fashion photography to slim models down.


Once you have manipulated the image to how you want press ok.


This will take you back to the original screen. From here you can flatten your image and save it.

Final Image


Photoshop Workshop 1 - Adding Colour

Before Image


Create a new layer using the icon at the bottom of the layers box.


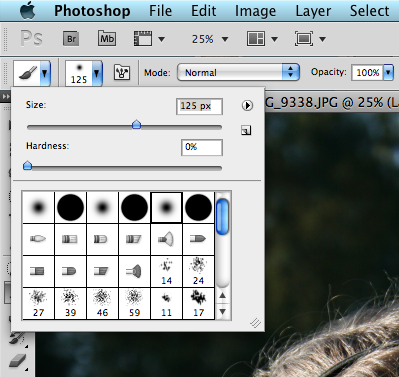
Select the Paint Brush tool. Make sure you pick and appropriate size and a soft edge.


Pick the colour you wish to use by selecting the colour icon on the left hand tool bar.


Paint the colour on to the areas you wish to change. Make sure this is done in the new layer.


Once the whole area you wish to change the colour of is painted, you need to go to the layers box, select the drop down box and choose overlay.


 Now you are ready to flatten your image and save.

Final Image


Tuesday, 4 October 2011

Photoshop Workshop 1 - Vignette

Before Image


This works best with black and white images. Make a blank layer in the layers box by selecting the new layer icon at the bottom.


Pick the brush tool from the left hand tool bar. Pick an appropriate size and a  soft edge.


Pick the colour your wish to use. Do this by selecting the colour tool in the left hand tool bar. This is mainly done in black or white.


Draw a border around the edge of your image. Hold down the shift key as you do this. Make sure this is done in the blank layer.


Then in the main menu bar at the top select Filter. Then select Blur and Gaussian Blur.


This will open a new window. Change the pixel rating, using the slider, to select the desired effect for your border.


Once done press OK. Then you are ready to flatten your image and save it.

Final Image


Photoshop Workshop 1 - Half colour Half Black and White

Before Image


Create a duplicate layer in the layers box. To do this grab the original layer and drag it down to the new layer icon at the bottom.


Select the new layer and turn this to black and white. This can be done by selecting image, then adjustments, then desaturate.


Select the eraser tool from the left hand tool bar.


Pick a suitable size and a soft edge.


Zoom in on your image and rub away the black and white, in the desired areas, to show the original colour that is on the other layer.


Once the picture is complete don't forget to flatten your image and save it.

Final Image